Welcome to the world of baking where simplicity meets delight! If you’ve ever been intimidated by the elaborate art of baking, fret not. Today, I’ll guide you through a foolproof, easy cake recipe that promises delectable results with minimal fuss. Perfect for beginners or those short on time, this recipe is your sweet ticket to a homemade masterpiece. Let’s bake magic!
Gathering the Ingredients and Supplies
Essential Ingredients for a Perfect Cake
Embarking on the magical adventure of cake baking begins with assembling the right artillery of ingredients. Flour, sugar, eggs, and butter lay the foundation of most traditional cake recipes. Yet, the choice of each can impact your baking masterpiece in both texture and taste. Opt for all-purpose or cake flour depending on the desired lightness of your cake. Granulated sugar is a go-to for most recipes, but exploring brown sugar or honey can introduce delightful flavors and moistness. Fresh, room temperature eggs bind the mixture, while unsalted butter allows you to control the saltiness in your recipe.
Consider the unique spin you might want to add with vanilla extract for a classic aroma, cocoa powder for a chocolate touch, or zesty lemon zest for a refreshing twist. Also, leavening agents like baking powder or soda are pivotal unless you want your cake as flat as a pancake!
Finding the Right Bakeware and Tools
Now, having rounded up the ingredients, it’s time to talk tools. The right bakeware is crucial to ensure your cake not only tastes good but also looks appealing. A durable set of baking pans, preferably non-stick, can handle the job for most cakes. Whether you opt for round, square, or a special shape like a heart, make sure you have the right sizes for your recipe. And remember, greasing your pan or lining it with parchment paper can be the difference between a cake that flips out effortlessly and one that stubbornly sticks.
On to the mixing tools – a sturdy whisk and mixing bowls are indispensable. Depending on your recipe, you may need an electric mixer to cream butter and sugar effectively. A silicone spatula ensures you scrape every bit of batter into your baking pan, minimizing waste and mess. Don’t forget the measuring cups and spoons; precision is key in baking to achieve the perfect chemical magic.
Preparation Before Baking
Before you preheat your oven, which is an essential step, do run through your recipe one more time. Make sure everything on your list has been ticked off and prepped. Ingredients need to be measured, and items like butter should be softened unless otherwise specified. This stage is also the perfect time to add those special ingredients like nuts, dried fruits, or chocolate chips. Give them a good toss in flour to prevent them from sinking to the bottom of the pan during baking.
Lastly, have a timer handy and be familiar with your oven’s quirks, as baking times can vary. Monitoring your cake towards the end of baking time ensures it’s perfectly done. Insert a toothpick or a cake tester into the center of the cake – if it comes out clean, your delightful creation is ready to cool and eventually, to grace the table.

Is Building a Wooden House the Ideal Choice for You?
Are you considering a lifestyle that aligns with your love for nature and sustainability? Building a wooden house might just be your perfect answer. This article explores the myriad benefits of choosing timber for your home, from its eco-friendly qualities…
Preparing the Cake Batter
Gathering Your Ingredients
Before diving into the creation of your cake batter, it’s essential to start with gathering all necessary ingredients. This preparation step ensures everything is measured and within reach, facilitating a smooth mixing process. Begin by ensuring you have the basics: flour, sugar, baking powder or baking soda for leavening, salt, eggs, milk or another liquid, and butter or oil for richness. Depending on your recipe, you might also need flavor enhancers like vanilla extract, cocoa powder, or spices. Always use fresh ingredients for the best results.
Choosing the Right Tools for Mixing
Equally important to the ingredients are the tools you use. A large mixing bowl, a sturdy whisk or an electric mixer, measuring cups and spoons, and a spatula are indispensable in the cake-making process. Using an electric mixer can significantly reduce the effort of mixing and ensure that your batter is smooth and well-incorporated. However, a hand whisk and some elbow grease can also get the job done perfectly, especially for lighter batters.
Mixing Dry and Wet Ingredients Separately
Start with sifting together all the dry ingredients—typically the flour, leavening agents, salt, and any powdered flavors like cocoa. Sifting not only breaks up clumps but also aerates the flour, resulting in a lighter cake. In another bowl, combine the wet ingredients: eggs, milk, melted butter or oil, and any additional flavorings. This method, known as the muffin method, helps prevent the overworking of the flour and keeps the cake tender.
Combining Ingredients to Form the Batter
Once you have your dry and wet ingredients ready, make a well in the center of the dry ingredients and pour in the wet mixture. Gently fold using a spatula until just combined. The key is to mix until you no longer see dry flour. Be careful not to overmix, as this can lead to a dense cake. If your recipe calls for fold-ins like fruits, nuts, or chocolate chips, now is the time to add them.
Safeguarding the Consistency
The consistency of the batter can make or break your cake. It should be smooth and pourable, but not too runny or stiff. If the batter seems too thick, add a little more liquid until you reach the right consistency. Conversely, if it’s too runny, a bit more flour can help thicken it up. Always make these adjustments in small increments to avoid altering the texture and flavor of your cake significantly.
Preparation for Baking
Once your batter is perfectly mixed, it’s crucial to prepare your baking pan. Grease the pan with butter or line it with parchment paper to prevent sticking, and then pour the batter in. Use a spatula to spread it evenly, ensuring that it reaches all corners of the pan. Tap the pan gently on the counter to eliminate any air bubbles. With everything set, your cake is now ready to enter the oven, where the magic happens.
Tips for Success
While mixing your batter, always start with ingredients at room temperature to ensure they blend seamlessly. Also, consider the oven temperature and baking time specified in your recipe – accuracy here is crucial for a successful bake. Lastly, have fun experimenting with different additions and flavors to discover your unique take on the classic cake recipe.

How to Plan the Ultimate Polynesia Travel Guide?
Embark on an enchanting journey to the idyllic islands of Polynesia with our definitive travel guide. Whether you’re seeking serene beaches, lush landscapes, or rich cultural experiences, this guide offers expert advice and insider tips to ensure your adventure is…
Pouring the Batter into the Pan
Essential Steps Before You Begin
If you think pouring cake batter is just about dumping your mix into a pan, think again! The process can greatly influence the outcome of your bake. Before you even preheat your oven, ensure your ingredients are well-mixed, at room temperature, and your baking pans are properly prepared. Greasing your pan or lining it with parchment paper is not just a suggestion; it’s a necessity unless you want your beautifully risen cake to stick disastrously to the pan!
Choosing the Right Pan
The selection of the pan is pivotal. The size and type of pan can affect everything from cooking time to cake texture. Typically, recipes will specify the appropriate pan size and type; if you deviate from this, you might need to adjust cooking times. For example, dark metal pans will cook your cake quicker and can create a darker crust, while glass and lighter-colored pans might need a slightly higher temperature.
Mastery in Measuring
Even distribution starts with how you measure and pour your batter. Begin by using a large spoon or a ladle to scoop your batter from your mixing bowl. Pour slowly and evenly into your prepared pan to avoid air bubbles. If using multiple pans for layer cakes, it’s crucial to distribute the batter evenly, ensuring each layer cakes evenly and ends up the same size.
Smoothing Out the Batter
Once the batter is in the pan, it’s time to smooth it out. Take a spatula (a silicone one works best) and gently guide the batter towards the edges of the pan, smoothing the surface. This not only prevents air pockets that can cause uneven baking but also ensures a flat surface which is particularly important for layered cakes. Don’t forget to tap the pan gently on the counter to release any remaining air bubbles.
Temperature and Timing
Before you slide your pan into the oven, double-check your oven temperature with an oven thermometer. Baking at the correct temperature is essential to achieve the perfect rise and texture. Place your pan in the center of the oven to promote even cooking, and rotate the pan halfway through baking if your oven has hot spots.
Post-Baking Care
After your cake has baked, it’s crucial to cool it properly to maintain its structure and texture. Let it sit in the pan on a wire rack for the time specified in the recipe before attempting to remove it. This resting period helps the cake settle and reduces the risk of it breaking apart during removal.
There you have it—the thoughtful art of pouring and baking a cake batter, which can be just as important as the ingredients you choose. Each step, from pan preparation to baking and cooling, builds towards the creation of a flawless cake. So next time you bake, give each step the attention it deserves, and you’ll be rewarded with a cake that not only tastes good but looks perfect, too.

What are the key features of the Tesla Model S?
In the realm of electric vehicles, the Tesla Model S stands out as a paragon of innovation and luxury. This article delves into its key features, including its impressive range, advanced autopilot systems, and seamless over-the-air software updates, which together…
Baking the Cake
Gathering Your Ingredients
Before the magic happens, ensuring you have all necessary ingredients at hand is crucial. A well-prepared baker is like an artist with all their paints ready: both flour and creativity must flow freely! Start with the basics: flour, baking powder, sugar, salt. Then, depending on your chosen flavor, gather ingredients like cocoa powder for a chocolate cake or zesty oranges for a citrus twist. Remember, high-quality ingredients elevate your cake from good to spectacular.
Preparing the Batter
Creating the perfect batter is a dance of precision and flair. Begin by sifting your dry ingredients together to prevent any lumps and ensure an even mixture. In a separate bowl, cream together butter and sugar until the mixture is light and fluffy—this aerates the batter, giving you a lighter cake. Gradually add eggs one at a time, beating well after each addition. Alternate adding dry ingredients and milk, starting and ending with the dry. Patience is key here; mix gently to keep the air in the batter.
Baking Your Creation
Every oven has its quirks, so knowing yours can be the difference between success and a baking mishap. Preheat your oven to the right temperature before sliding your cake pan in. It’s usually best placed in the middle of the oven to ensure even heat distribution. Bake until the cake tests done with a toothpick or skewer—if it comes out clean, your cake is ready to cool and then decorate. Cooling is as crucial as the baking; it sets the structure of the cake.
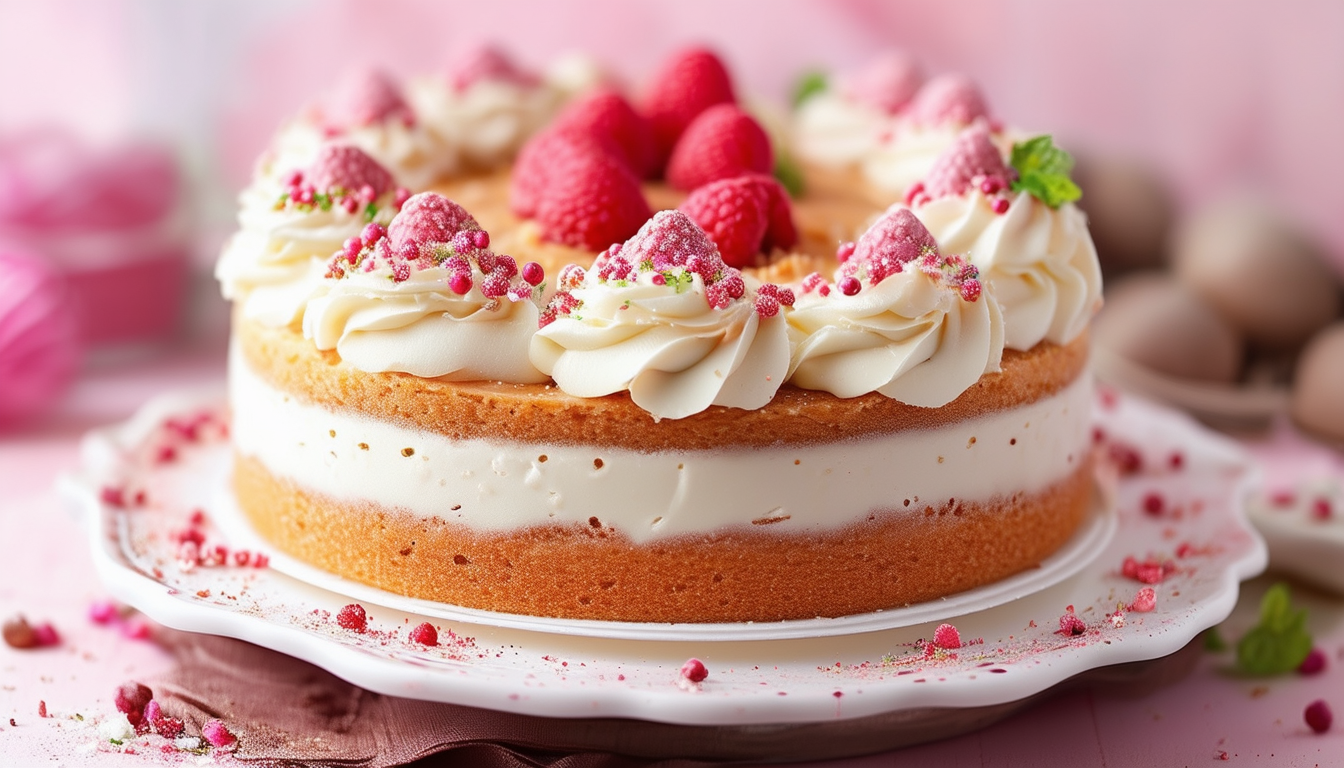
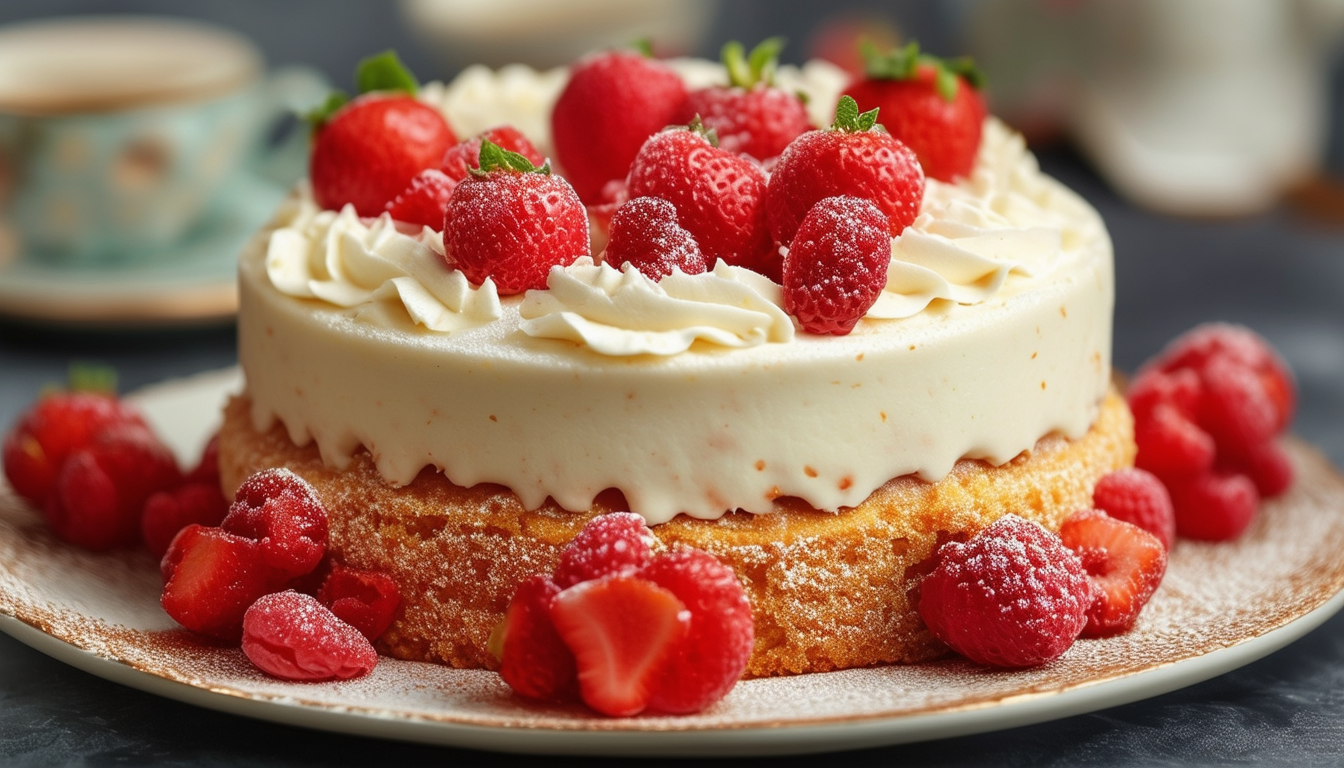
Decorating with Flair
Now comes the truly creative part of the process—decoration. Whether you prefer a simple dusting of powdered sugar or elaborate layers of buttercream frosting, this is your moment to shine. Fresh fruits, edible flowers, and custom-made fondant pieces can all serve as stunning embellishments. If you’re trying something new, remember: practice makes perfect. Decorating is an art that rewards patience and persistence.
Storing and Serving
Ideally, cake is best enjoyed fresh, but sometimes you need to store it. Keep it under a cake dome or wrapped in plastic to maintain its moisture. Cakes with frosting or fillings requiring refrigeration should be stored accordingly. When serving, ensure the cake is at room temperature to maximize flavor and texture. A well-made cake not only captivates your taste buds but also turns any ordinary gathering into a celebration.

In the ever-evolving financial landscape, Bitcoin stands as a beacon of potential wealth and technological innovation. This article delves into the complexities of investing in Bitcoin, weighing its risks against its prospective rewards. We will explore the variables influencing Bitcoin’s…
Allowing the Cake to Cool
The Importance of Patience: Why Cooling Matters
Imagine the moment your cake emerges from the oven, golden and fragrant, tempting you to slice into it immediately. However, allowing your cake to cool is a critical step that can mean the difference between a good cake and a great one. Cooling your cake properly sets the stage for easier handling, enhances flavor, and improves texture.
Tips for Cooling Cakes: The Essentials
Once your cake has finished baking, remove it from the oven and set it on a wire rack. This allows air to circulate around the cake, helping it cool evenly. Resist the temptation to leave your cake in its hot pan for too long, as this can lead to sogginess from the steam trapped beneath. Typically, 10-15 minutes in the pan is sufficient before you should remove the cake from the pan to cool completely on the rack.
Handling Different Types of Cakes
Not all cakes should be cooled the same way. For fluffy chiffon or angel food cakes, cooling upside down can prevent them from collapsing. Using a bottle or a cooling rack inverted will ensure they maintain their volume and light texture. Denser cakes like pound cakes or bundt cakes require thorough cooling in their pans to set their structure before you attempt to remove them.
Avoiding Common Cooling Mistakes
- Rushing the process: Giving your cake enough time to cool prevents it from crumbling when you cut it. Patience is key!
- Removing from the pan too early: This often leads to a broken cake. Follow the recommended time in the recipe.
- Using the wrong tools: Always use a wire rack to avoid moisture from building up beneath the cake.
When is the Cake Ready to Decorate?
A fully cooled cake is the perfect blank canvas for decoration. Touch the base of the cake to ensure it’s completely cooled. Any warmth can melt frosting, leading to a messy cake decoration experience. Ideally, a cake that has cooled for at least a couple of hours will be stable enough to embellish with your favorite frostings and decor.
The Final Touches: Storage for Optimal Freshness
If you’re not decorating your cake on the same day, wrap it in plastic wrap and store it at room temperature. Cakes kept in the refrigerator can dry out, so avoid refrigeration unless necessary. For those looking to preserve flavor and moisture, proper cooling and storage are just as important as the baking process itself.
Frosting and Decorating the Cake
Choosing the Right Frosting
Frosting is more than just a decorative touch; it’s the shield that keeps your cake moist and flavorful. The key to picking the perfect frosting lies in understanding the flavor profile and texture that you desire. Buttercream, for instance, is rich and creamy, ideal for creating smooth surfaces and intricate designs. For a lighter touch, whipped cream frosting makes for a fluffy and subtly sweet coating, perfect for less decadent cakes. Those seeking a glossy, elegant finish might gravitate towards ganache, which glazes over cakes with a sleek, chocolatey covering.
Tools of the Trade
Before diving into the art of decorating, assembling the right toolkit is essential. A few basics include offset spatulas for spreading frosting, piping bags fitted with various tips for detailed designs, and a turntable to rotate your cake as you work. Additionally, consider having smoothing tools like a scraper to achieve a perfectly even layer of frosting. A well-equipped baker’s toolbox is the first step towards a beautifully decorated cake.
- Offset spatulas for even spreading
- Piping bags with a selection of tips
- Turntable for easy rotating
- Smoothing tools like scrapers
Frosting Application Techniques
Applying frosting might seem straightforward, but a few techniques can enhance your cake’s overall appearance. Start with a crumb coat—a thin layer of frosting that seals in crumbs—allowing it to chill in the fridge before adding the final thicker layers. This base layer is crucial as it provides a smooth canvas for further decoration. Once your crumb coat is set, apply the main layer of frosting using an offset spatula, working your way from the top down to the sides of the cake.
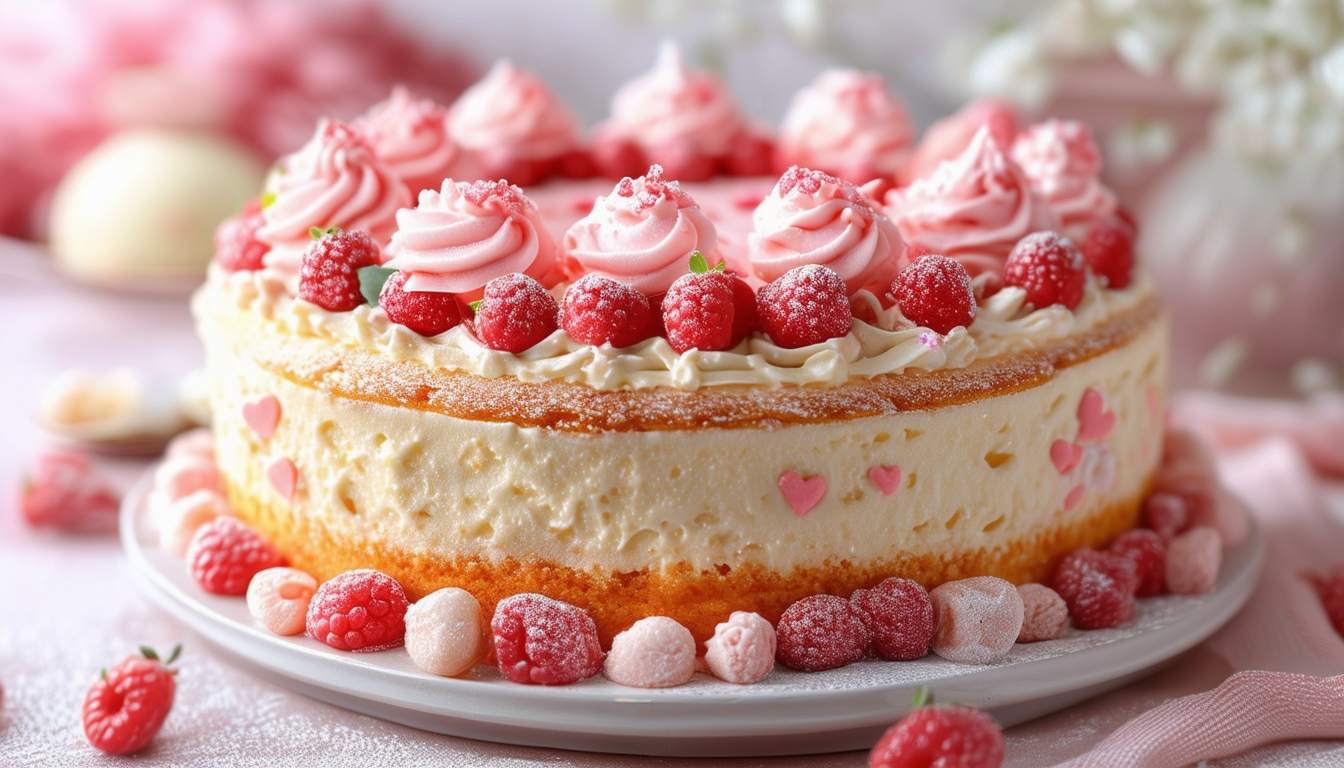
Creative Decorating Ideas
Now comes the fun part—bringing your cake to life with decorations. If you’re aiming for elegance, consider piping roses or intricate lace patterns. For a playful touch, use colorful sprinkles, edible glitter, or themed cake toppers. Techniques like ombre frosting or marbled effects can also add a sophisticated twist to any cake design. Remember, the goal is to complement the cake’s flavor and occasion, so let your creativity shine!
Mastering Piping Techniques
Piping is an art that can elevate any cake from simple to spectacular. Practice different piping techniques using various tips. For example, star tips create beautiful rosettes and shells, while round tips are perfect for writing and making dots. To ensure precision and ease, maintain a steady hand and consistent pressure on the piping bag. Experimenting with borders and piped flowers can also add a professional touch to your cake creations.
The beauty of cake decorating lies in the joy it brings both during the creation and in the final reveal. With patience and practice, anyone can transform a simple cake into a splendid masterpiece. Delight in each spread of frosting and every swirl of design as you embark on this sweet artistic journey.
Serving and Enjoying Your Delicious Creation
Setting the Stage for Your Culinary Showpiece
Once your cake has cooled and been meticulously decorated, the next step is to present it in a way that heightens anticipation and showcases your effort. Start with the right plate or cake stand; something that complements the style and size of your cake. A classic white stand can spotlight a colorful creation, while a more ornate stand pairs well with a simpler cake design. Additionally, think about the backdrop: a clean, clutter-free table with subtle decorations can make your cake a focal point.
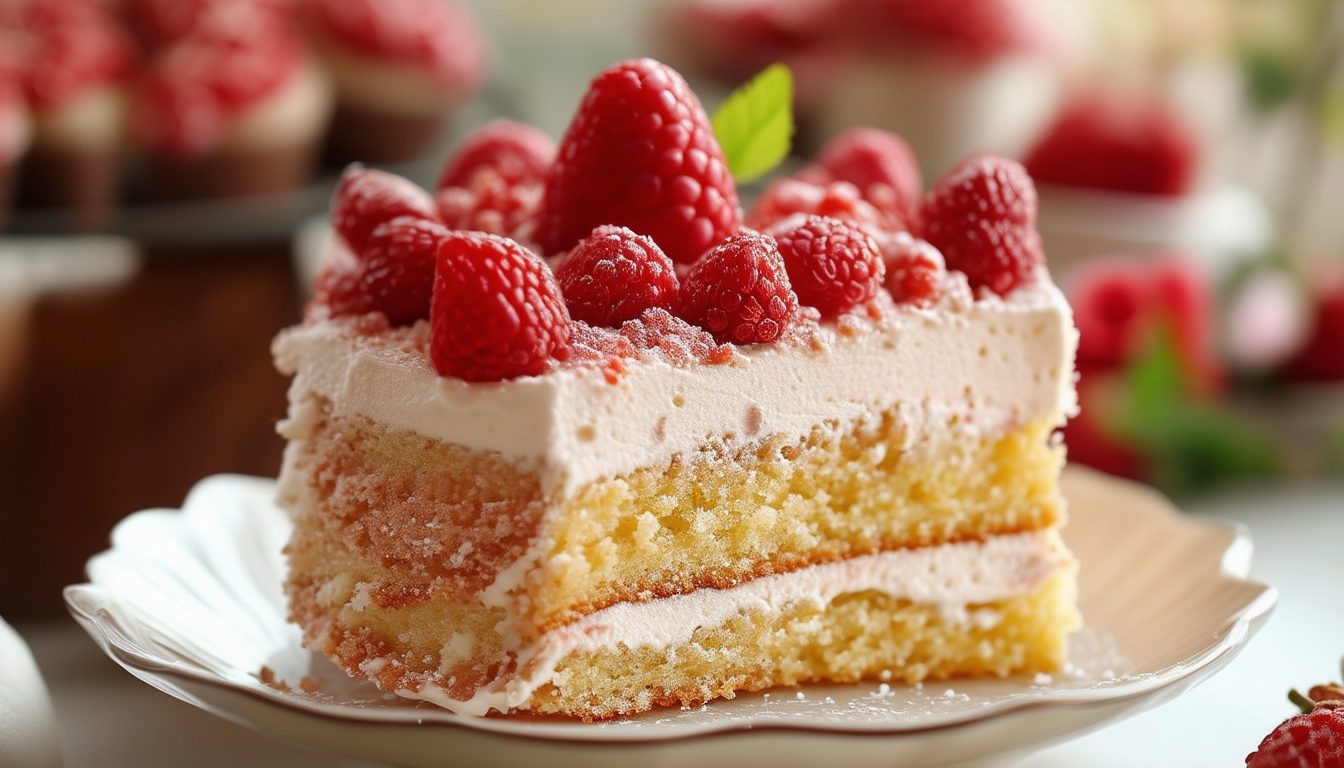
Perfect Slices for Elegant Presentation
To achieve those clean, magazine-worthy slices, patience and the right tools are essential. Ensure your cake is fully set—chill it in the fridge if recommended. Use a long, sharp knife, and for even more precision, dip the knife in hot water and wipe it clean between slices. Consider the type of cake to determine the best slicing technique: delicate cakes may require a gentler sawing motion, whereas denser cakes might need a firmer cut.
Elevating the Flavor with Pairings
Complementing your cake with well-chosen accompaniments can transform a simple dessert into an extraordinary culinary experience. For rich chocolate cakes, a dollop of whipped cream or a scoop of vanilla ice cream can balance the intensity. Fruit cakes might pair beautifully with a tangy lemon sorbet or a drizzle of fresh berry compote. Consider the cake’s flavors and what drinks or other desserts can enhance them—coffee, tea, and even sweet wines or dessert cocktails.
Creating an Engaging Serving Experience
Engage your guests by making the serving process interactive and fun. You could set up a ‘decorate your own slice’ station with various toppings like sprinkles, nuts, and sauces. This not only makes the experience more memorable but also tailors the dessert course to individual tastes. Moreover, sharing the story behind the cake—perhaps it’s a family recipe or inspired by a special event—can add a personal touch that enriches the enjoyment.
Adjusting Serving Sizes to the Occasion
Estimate the number of guests and the role your cake is playing in the meal to determine how large each piece should be. A richer cake in a full dinner setting might require smaller slices than a lighter cake at a casual afternoon tea. Being generous but realistic with portion sizes ensures that every guest gets a taste without overwhelming them, especially if there are other desserts on the menu.
Each step in serving a cake, from the cut of the slice to the pairing and presentation, helps elevate the overall dining experience. By focusing on these elements, your lovingly baked creation not only delights the taste buds but also captures the imaginations of your guests, making it a memorable highlight of any meal.